SCHS Dispatches — Scott County Historical Society

What’s Cooking?

After indulging over the holidays, it seems that each January we pledge to exercise more and eat healthier.  Cookbooks are the go-to resource for the “eating-better” part of that new commitment.  But did you ever wonder about where these marvels of gastric chemistry originated?

Prior to the 1750s, cookbooks were written by chefs for chefs.  Many families had their own “note [cook] books”, that included recipes not only for food, but also for medicinals (think headache cures) and cleaners (such as shoe polish). The first cookbook for housewives was published in England in 1757.  It consisted of artistic recipes designed to help homemakers create fancy meals.

America’s first known cookbook, American Cookery, was written in 1796 by Amelia Simmons.  Many of the book’s recipes called for distinctly American ingredients such as pumpkin and corn.

In 1845 Eliza Acton wrote Modern Cookery for Private Families, and was the first cookbook to list ingredient quantities and cooking times.  In addition to recipes, Acton’s book included information for women about morals and etiquette.

Fannie Merritt Farmer is credited with creating the modern cookbook.  Farmer attended and later taught at the Boston Cooking School.  In 1896 she wrote Boston Cooking School Cook Book.  Using scientific methods, her recipes were the first to give precise measurements and instructions.  She also established the practice, still used today, of writing a recipe by first listing the ingredients and their amounts and then writing out precise instructions for preparing the dish.

So, the next time you use a cookbook, think of its long history and all the trial and error that went into creating the yummy recipes.  Happy Cooking!

20080300001.jpg

Glass Photographs?

We take photos at the drop of a hat. A quick click and we can snap a ton of images or share a selfie with the world in seconds.  But not so long-ago taking a photograph was difficult, required great skill, and each image was precious.

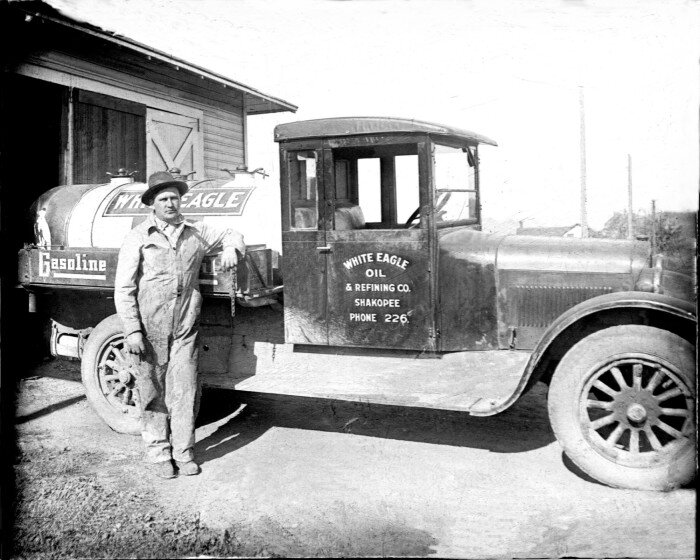
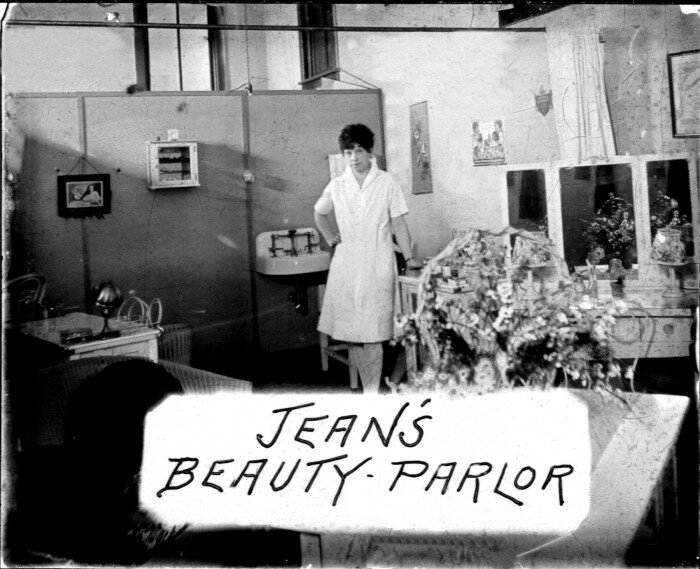
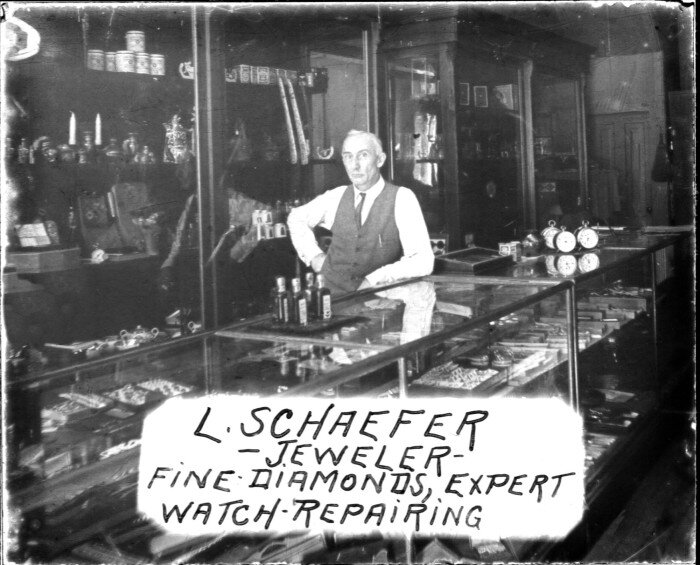
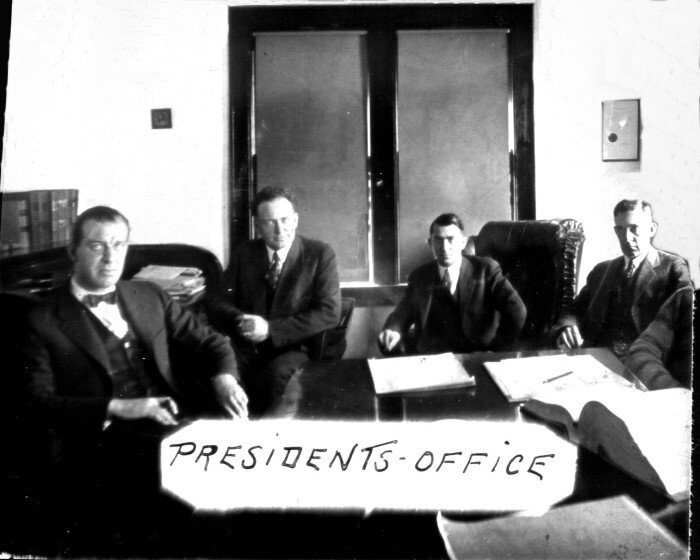
Beginning in the mid-1800s, photographers used glass plates to capture images – collodion wet plate and gelatin dry plate.

Collodion wet plate negatives were in use from about 1851 until the 1880s.  Collodion (a flammable liquid) was spread on a glass support (plate), then placed into a bath of silver nitrate, which turned the collodion into a photosensitive silver iodide.  When plate was exposed to light, it would capture an image. The big problem with this process (from smearing the plate to processing the photo), was that it had to happen before the plate dried; in about 5 – 15 minutes depending on the light.  You can identify these types of negatives by their uneven emulsion coating, thick glass, and rough edges.  Sometimes you can see the photographers thumbprint on the edge because they would be the one to mix and apply the emulsion.

Dry plate (Silver Gelatin) negatives were first available in 1873.  Unlike the wet-plate variety, gelatin dry plates were – yup you guest it – dry!  They were more easily transported and needed less exposure to light.  Photographers and manufacturers could prepare the negatives in advance and develop the images long after exposure. These negatives are identified by having thinner glass and a more evenly coated emulsion.  Dry plate glass negatives were in common use between the 1880s and the late 1920s.

These types of negatives were used in view cameras – large hulky boxes. The great thing about photos made from these negatives is that they often contain a great amount of detail and subtly of tone, due to the skill of the photographer and the nature of the emulsions.  Common negative sizes were 4×5, 5×8 and 8×10, larger sizes were also common.

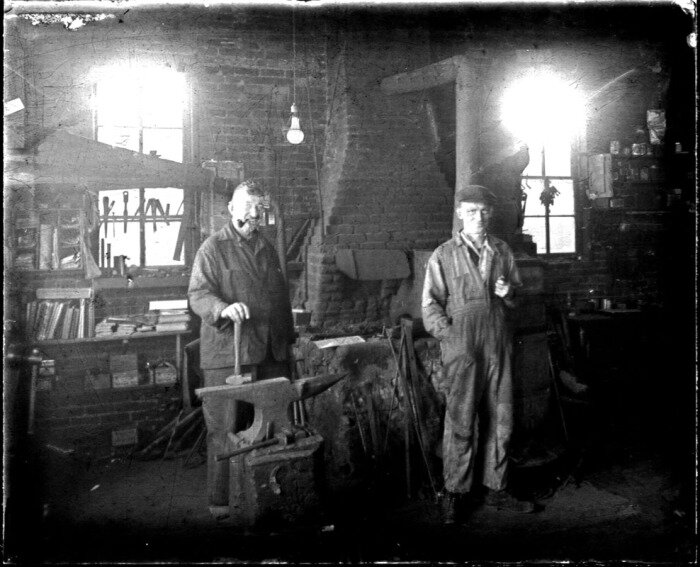
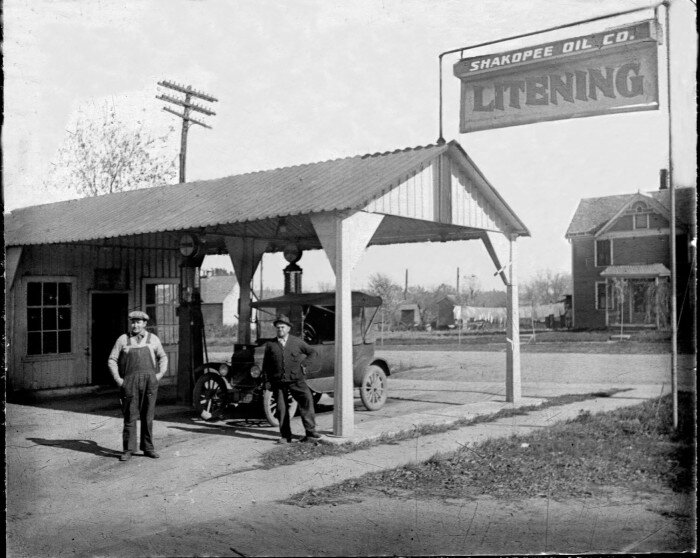
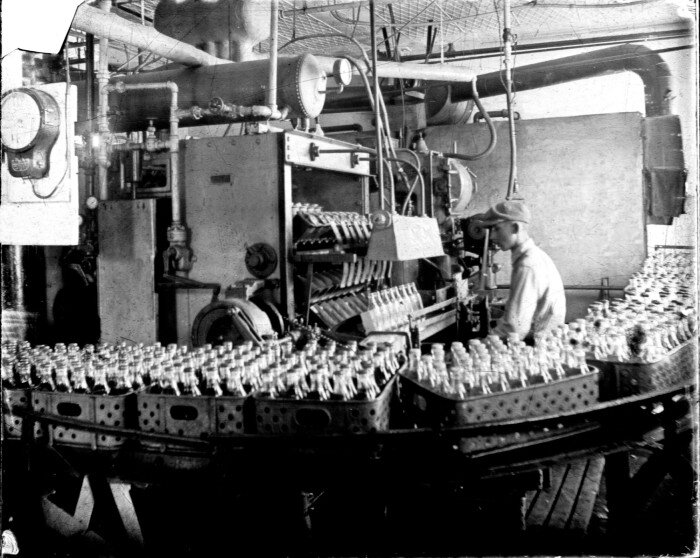
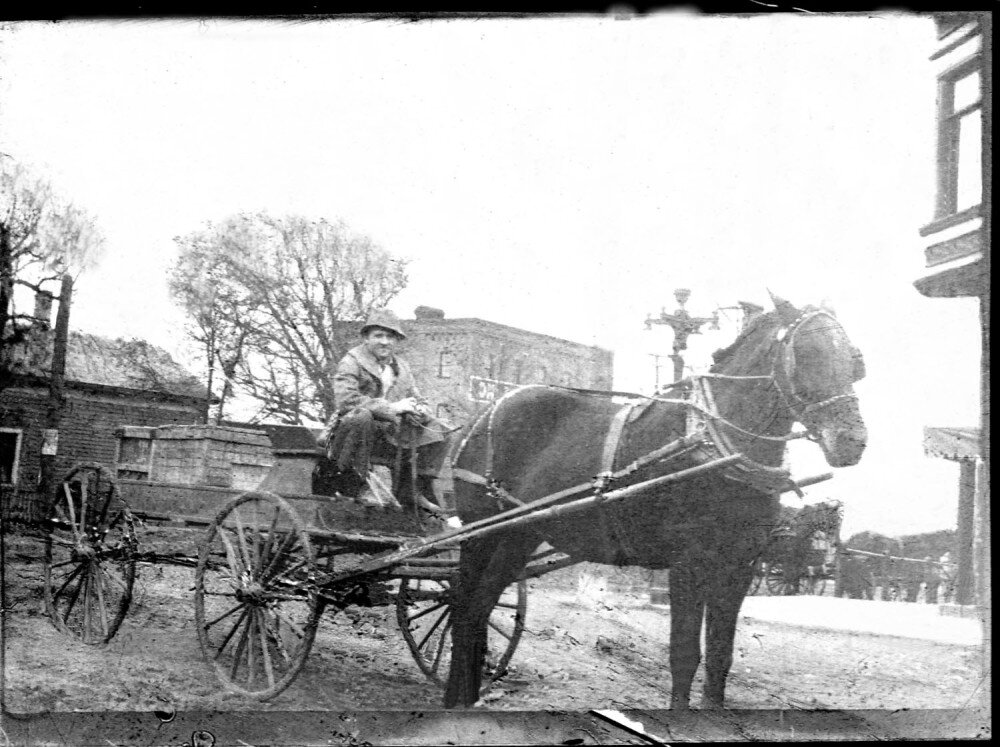
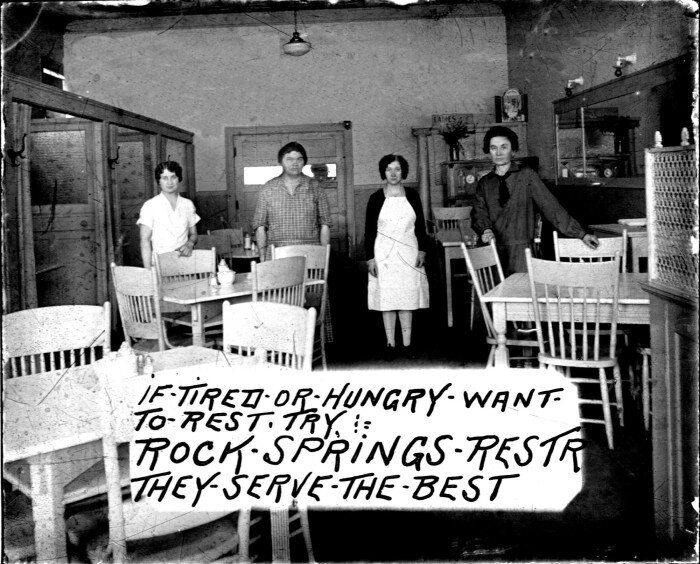
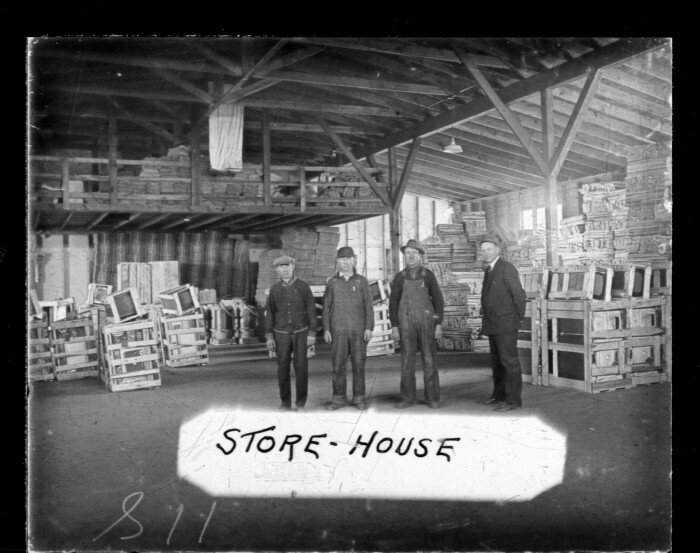
Click through photographs below to view a gallery of glass plate negatives in the SCHS collections.

Taking the photo:

Once a photographer was satisfied that his subject was sufficiently well lit and positioned*, they would select a plate and follow these steps:

  1. Place a dry plate (contained in a plate holder) into a slot in the camera

  2. Slide the cover from the plate holder to uncover the dry plate

  3. Uncover and then recover the lens. (By 1880, photographic plates were so sensitive that an exposure of less than a second was often enough to capture an image.)

  4. Slide the cover on the plate holder back over the dry plate

  5. Remove the plate holder containing the exposed plate, which was now ready for processing in a dark room.**

* Many times, photographers used frames or braces to hold a subject steady during the exposure time. Any movement could cause the image to blur.

** These plates could produce multiple prints

Developing the photograph:

  1. Moisten the plate in distilled water

  2. Place the plate in a glass or developing dish, and cover with developing fluid

  3. Wash thoroughly when the image appeared

  4. Place in a bath of fixing solution, and then wash and dry the plate. It could be varnished at this point, but this was rare after about 1890.

Printing Process:

Printing Out Paper (POP)

  1. Fairly thin paper treated with photosensitive silver chloride crystals in a gelatin glaze. (used for printing photos that were mounted on strong cards).  These prints would usually be toned and fixed.

  2. The POP would be placed under the negative in a special frame then exposed to daylight or artificial light until the image developed

  3. The print would then be washed in water to remove excess chemicals

  4. The print would then be toned using gold and platinum toners (to convert the silver into more stable compounds)

  5. Washed again and fixed using standard fixing solution

  6. The final step was to have the photograph air dried or, squeegeed on a clean polished glass surface and allowed to dry

Platinum Print (Plat), often used for landscape or architectural photos.  In this method the metal on the paper was platinum, not silver, and iron salts were used for developing.  These prints had a wide range of subtle tones, usually silvery-grey.  The price of platinum skyrocketed in 1907 and production of the paper stopped by 1916.

Carbon orienting was another process, which produced a matt finish in colors ranging from rich sepia tones to cooler shades of blue and grey.  These types of prints were resistant to fading so were most often used for commercial photos.  Other types of prints include Bromide, Bristol, Cabinet, Cameo, Carte de visite, Mezzo, and Vignette

Glass plate negatives are fragile, not only because they are made of glass, but also because the emulsions can easily be scratched or slip from the glass.  These negatives should be housed in an archival quality four-flap envelope, which enables the negative to handled without scratching the surface. The envelope should then be stored in an archival box on their edge (straight up & down) and stored with negatives of similar size.  Because these plates are heavy, the box shouldn’t be filled tight – a spacer can be put between the negatives to hold them upright and reduce the weight of the box.

Glass plate photographic material largely faded from the consumer market in the early years of the 20th century as more convenient and less fragile films were adopted.  However, plates were still being used into the 1970s, most likely because of their great detail and tonal qualities. 

Flexible films were available in the late 1880s for amateur use, but the plastic was of poor quality, tended to curl, and initially was more expensive to produce than glass.  However, quality improved and manufacturing costs came down and amateurs abandoned plates for film. Now as technology changes yet again, we’ve abandoned film for digital images.

Why is the New Year in January?

hail-caesar.jpg

If you have ever wondered why the New Year starts in the freezing cold of January, you can thank Caesar. That’s right, Julius Caesar, leader of the Roman Empire. Before Caesar took power the length of a year was somewhat subjective. Politicians in Rome might add days, or subtract days to increase terms in the Senate; and it was based around the phases of the moon, but kept falling out of line with the seasons. Enter Caesar, who sought to set the calendar into a more predictable cycle, except he did so starting most of the way through the year, 45 B.C.E. As such, the Julian calendar began on January 1st instead of in March as was tradition.

By the time of the Middle Ages, the holiday had fallen into obscurity. Everyone knew the year started on January 1st, but the celebration of it went unobserved. The reason was because January 1st kept moving. Caesar did not calculate that a year is about 365.24 days long; instead he calculated at 365.25. After about a thousand years of adding a few minutes every year the calendar ended up having 376 days and kept adding. So in 1582 the Gregorian calendar came along and instituted the idea of the leap year to balance things back out. Since then, the first has been consistent, and thus people began to celebrate the New Year with regularity.

Happy New Year for all of us at the SCHS!

Written by Dave Nichols, Curator of Collections